


Cut & tape together pattern then cut pieces according to your size.
The pattern I used for this is free! and online {HERE, GARDEN PARTY DRESS}

Cut the fabric needed and mark according to pattern on the "wrong" side of the fabric.


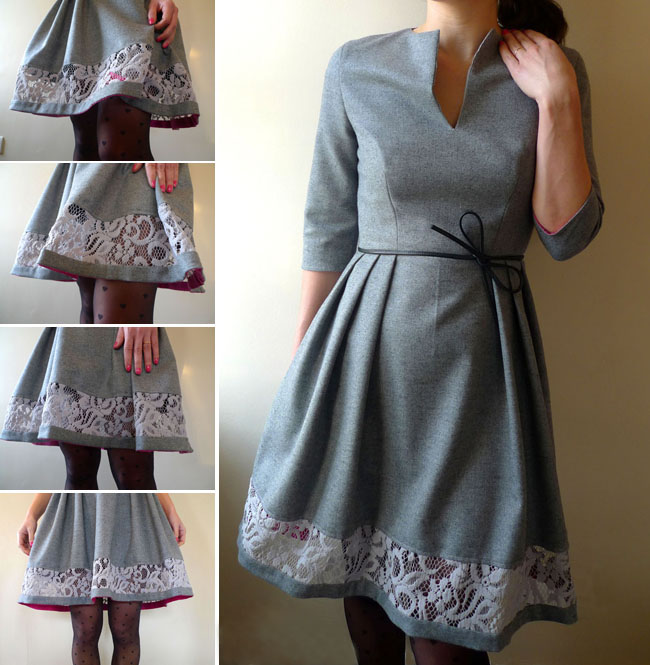
As you can see, I still have quite a lot to do yet.
What I have learned so far...
1) BASTE, BASTE, BASTE! much easier than pins, especially when I don't have a form to be pinning on and have to try it on frequently myself... don't really want to be poking myself.
2) Zipper lengths are easily shortened... with some improvisation. {How to shorten zipper, youtube video}
3) Speaking of zippers... if I had invisible zippers handy I would have used them. I did not have enough fabric/give to "create" an invisible zipper and I did not sew the zipper in between the fabric and lining. I'm still a beginner when handling really delicate fabric so for my first apparel project, the zipper is not going to look nearly as polished but I think I can make it work anyway. Besides, for a first go, I'm pretty pleased with the results so far.
4) Darting (esp. bust line) is tricky. This is where it was really important to keep trying it on. I modified the original darting pattern and "rounded" it off by sewing a short line approximately 150 degrees from the bottom line of the angle (that is parallel to the edge of the fabric). I really didn't want the dart to look pointy... that... is also not my style. I'm no Madonna.
5) Iron all the time! It really helps negate the effects of pins/clips distorting where the fabric lies, especially when there are layers.
6) This is also the first time I used an actual apparel pattern and up until yesterday I really had never even bothered reading one. As usual, I am really not known to read instruction manuals and such so it comes to no surprise that I did not know to figure out what every marking meant. Thankfully, when I did look them up it turns out that I didn't screw up anyway. I spent a lot of time just sitting and thinking about what I thought it meant and what made sense with the little sewing knowledge I had. Most importantly, I am glad that I happened to cut directionally with the grain properly ... I learned my lesson... I am paying more attention to these markings.
Here is a great quick tutorial on Understanding Sewing Pattern Markings by Tilly and the Buttons (One of my favorite blogs to follow!).
This is one of the honigdesign's originals:
Sewing this dress really makes me feel conflicted. On one hand, given how long it takes me to sew part of me just wants to go out and buy a dress instead... on the other hand, this makes makes me think (especially since I'm not big on reading instructions... I think I like giving myself a challenge... or perhaps I'm just difficult) ... and this is fun!
There are just soooo many things to make (Pinterest board just keeps growing)! I was asked recently if I was going to create a "SWAP" (Sewing with a plan). That's not really my style. It doesn't take much to get me to sew apparently. Right now I have a lot of fabric, assortment of hardware, assortment of invisible zippers that will come in the mail (ha ha), etc. There are a few post it notes attached to some of the fabric that reminds me what it is intended for. When I'm in the mood to sew I'll simply make whatever I'm in the mood to make, I just have to have a lot of fabric/hardware/accessory options available to do so. It'll be good to work this way because when I move back to Ohio I will not be a quick drive to any sewing-related store anymore so there will pretty much need to be a store in my own home.
Sewing is not a cheap hobby for me at all, especially since I do not SWAP, but it sure is enjoyable :). It certainly isn't any more expensive than when I go through my "retail therapy" phases!
Have a great day!


0 comments:
Post a Comment