Dash of Rose

A dash of rosy positivity

Sunday, May 4, 2014

First Kentucky Derby

One of my besties drove down from Columbus to spend the weekend with me and we had quite a blast!

She drove in on Friday night and our first Derby-related excursion was to go check out the garland that is made by the florists at one of our local Krogers.
It's amazing, they hand pick every single rose, and then hand sew every rose onto the fabric that has preservative water in between.  There are 540 roses in the garland and my friend and I got little keepsakes of rose petals from these roses.  We got to take a little bit of derby home with us on Friday.

The Paddocks:


These drinks are delicious, Lily's are the official Oaks (Friday before Derby) drinks and they are just... yes, too good.  They also come with keepsake glasses each time, so we accumulated a few glasses during the day.

One of the fun hats at derby... flamingos.  There were just so many fun hats that range from really elaborate to absolutely absurd/zany.

These are photos before the first race of the day (Derby was Race 11 so no way were we able to find room to be able to see them come out with the crowds in the way).


 Then we moved on to the Infield.  The morning was very nice and peaceful with plenty of space to breathe in.  By the time afternoon came along it was just insane with broken glass on the ground, trash strewn everywhere, crazy people running around... quite a show.  The picture below shows what it was before any of that set in.


Mint Julep + Pretzel

I got a mint julep (not from here) and spotted this mint julep mascot.  Really excited about this.


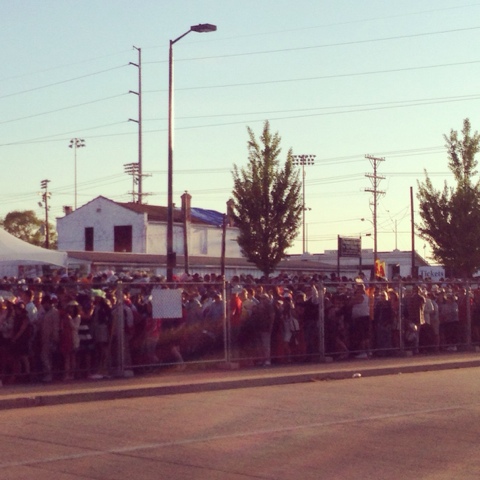
This is the crowd leaving Derby...


We ventured to a different part of the Paddocks, to take photos with the horse statue.  I really enjoy this photo because it looks like we've been photobombed.

This weekend has been absolutely amazing and just what I needed.  Spending some fun girl-time at the tracks is a great way to kick off this month of May.  I just wish I could wear big hats and dresses all the time!

Dress: Nikola Dress from Anthropologie (On sale Right Now)

Although this dress is not brightly colored, I went with something that was more appropriate for the infield where I would occasionally have to sit on the ground and such.  Next year we're thinking of getting actual seats and bringing the guys with us. Derby is a worthy experience and I can't wait to do it again! I didn't win any of my wages, but I definitely win in good company and sunshine.


Read More

Thursday, May 1, 2014

Dressing for Dawn at the Downs

Welcome to Louisville, home of the Kentucky Derby!

Our department had a fun off-site event this morning to head over to Churchill Downs for breakfast: Dawn at the Downs.  What a beautiful day!

It was a lot of fun planning my outfit for this outing because it offered up an opportunity to sew! (Not that I need any excuses).  I realized that my closet had very few work-appropriate dresses because I knew that as soon as breakfast was over it was back to work!

The dress I chose to make was based on the Mint and Tiffany Style dress I made in a previous post.  The original dress pattern calls for knit fabric but it's hard for me to find knit fabric that I like, much more difficult than woven fabric.  I used fabric that I bought before spring as I was planning for spring fabric projects.  The only real change is that instead of a dress that slips on, I modified it with an invisible zipper in the back.  It fits well and I am pleased with how it turned out.  I sewed this earlier this week, just in time for breakfast at the tracks!

Now, on to photos of Churchill Downs on this beautiful and sunny day!
Out at the paddocks.


Blown glass model of Churchill Downs.


View from Millionaires Row.  It was still pretty exciting at the tracks because the horses were out in the early morning practicing.  Without the noise from the crowds, we could actually hear the horses heave as they pounded around the tracks.  They are such beautiful creatures and I'm looking forward to this Saturday as I'll be headed to the Kentucky Derby!  My friend and I are spending it in the infield so it's not as "fancy" as the grandstands or other seats but it'll save money for the tracks!  The day should be great fun as I have heard that the infield is like a giant party!

Read More

Wednesday, April 30, 2014

April Blog Swap


This treasure arrived on a beautiful spring saturday.  The day was sunny, bright, warm and everything just fell together wonderfully.  This blogger swap gift was like the icing on the cake.

I was paired with Kristy of Lemonade Runway and I must say... she has quite an eye for treasure.

As soon as I opened the box I was pleasantly surprised over the abundance of sparkly, purple fun filling the box.  Kristy is so vibrant and thoughtful.


Beautiful Packaging  // Decorative paper for crafts
... would be great for cards too!  //  Really cute little wallet from from Target
Antique teacup with Lilacs (her home state flower!)  //  Yummy, Yummy Cookies
Thrifted fabric that suits my tastes perfectly, quite excited to work with this!  //  Tea time? :)


THANK YOU KRISTY!


Go and check out everybody from the blog swap too!


Read More

Monday, March 31, 2014

Spring throw pillows: birch ruffles


I was going back and forth about what to do with the birch and woodpecker fabric that I have.  I only bought a yard of it because although I loved the pattern, I had no real idea as to what I was going to do with it.  As I was standing in my living room and looking at the couch I realized that as much as I love my bow and fox throw pillows (post and tutorial here), the material and colors were too fall and winter... Looks like I found a purpose for the birch fabric! It is great for spring with its light and airy colors.  It is also relatively smooth to the touch so much more practical as a pillow cover.

Here's a break down of the general steps I took to create the slipcover (It's got a zipper!)

Top Left: Gather the materials you need! For each pillow, cut 2 squares that is about an inch wider and longer than the pillows.  For the ruffles, it will be folded long-ways in half so have the folded width to be about half an inch wider than the desired width for the ruffles.  Length of the ruffle fabric was about 2.5 the perimeter of the pillows.  It really depends on how much gathering (how tight the ruffles) you prefer.  You could always go with a longer length and shorten it later.

Top Right:  The fabric I have was not nearly long enough to have the ruffle fabric length I needed the first go around so I sewed strips of them together.

Bottom Left: Fold the ruffle fabric long-ways and baste through the fabric to form gatherings to the tightness you like.

Bottom Right:  Pin the ruffles on the right side of the fabric facing towards the middle.  Sew around the edges but make sure you are careful to not accidentally overlap the ruffles too much as you sew.


Top Left:  This is what the ruffles will look like when you turn it right side out.

Top Right:  Sew the zipper along one side over the ruffle.  Right side of the zipper laying on the ruffle.

Bottom Left: Sew the other side of the zipper to the other square (Note, if you have a patterned fabric that has a distinct direction, make sure you are having it face the right way).

Bottom Right: Unzip the zipper

Pin the squares together with the ruffles in between them facing the center.  Make sure the ruffles are as far away from where you are going to sew as possible, you want to make sure the ruffles still exist when you turn it right side out.  Sew around the perimeter of the pillow carefully (remember, there are ruffles to consider).  Turn it right side out and you've got a ruffled pillow that can zip up!

I went back and hand sewed parts of the zipper to make sure it was laying right and completely done.


It's convenient I had zippers that were pretty similar to the color of my fabric.  The zipper on the left REALLY blends in beautifully, it's like an extra birch tree!

Hope everybody is having beautiful spring sunshine!
Read More

Thursday, March 27, 2014

Double the stripes: shirt and skirt

SO MANY STRIPES! I ordered this striped jersey fabric a few weeks back from Fabric.com.  It is such nice fabric, soft and comfortable!

This week I decided to use it up because I really wanted some casual spring additions and these looked like they would be easy projects... which turned out to be true!

First up is the Plantain shirt by Deer & Doe that was made in approx. 2 hours.  This shirt pattern is great because it can be short sleeve, 3/4 length, long sleeve, have patch on elbows, etc.  What makes it even more than great is that it is completely free! She has this Plantain t-shirt pattern for free online.  This is a great beginner apparel project, so go try this out!

I actually wore this shirt to work today though I'm not sure if people could tell that it was a shirt that I sewed... There is ONE person who did figure it out pretty quickly though, my awesome manager who is a much more advanced sewer than I.
I really like this shirt because it has a lot of movement, comfortable without it looking slubby... so it is still appropriate for "smart casual" dress code at work and good for this transitional weather.


 Now on to the skirt! Actually, this is a second attempt with this skirt as I wasn't completely sure how it would lay once I was done.   The width of the fabric is double my natural waist size. The first run with this fabric for this skirt I kept it overly simple where I had the top folded over with an elastic in between but the top of the skirt was way to bulgy and just did not look flattering with this specific jersey fabric because it is actually really thick. This is the tutorial that is similar to what I originally attempted with this fabric.  If the fabric was not as thick and bulgy it would have been fine.  So, I ripped the seams up and went a different route.  I sewed around the waist of the skirt to gather it up, then sewed it to a circle waist band fabric piece.  Then I used a wide elastic band just slightly smaller than my waist and folded the waist band fabric over that to enclose it.  This was much flatter at the top and also much more flattering.  Even with just about starting over on the skirt, it really didn't take long either.  If I had not screwed up, maybe like 1.5 hours?


Warm weather is on the way, hooray! AND, it is almost Friday!


Read More

Friday, March 21, 2014

Welcome Spring: Part 2

Still so glad that it is spring now, this past winter was a bit fierce and wreaked havoc on the roads and trees.  Even though winter is beautiful, it got to the point that it outstayed its welcome.  Spring, on the other hand, I welcome with open arms!

I love pink and I probably wouldn't have bought myself such a pink frock but somehow sewing it makes all the difference (similar to the blouse post yesterday I suppose).  I actually originally intended to make this dress with a much darker color... a dark raspberry.... but, they ran out of stock between my order and when they were preparing my order.  This was my second choice that I had ordered anyway without any specific plans for it yet.  Pink saved the day!


I'm such a fan of the cut out in the back and the timeless cut/fit of this dress.

I think the dress itself could still use some work in terms of its fit.  Given that the material is relatively structured, it is not nearly as forgiving as lets say... a knit.  Even so, this dress was also very easy to sew.  Deer and Doe makes such great patterns that turn into beautiful outfits!

Spring projects are so fun and colorful... such a boost!

Read More

Thursday, March 20, 2014

Welcoming Spring: Part 1

"Spring is the time of plans and projects." -- Leo Tolstoy, Anna Karenina

Today marks the first day of spring and it's such a beautiful spring day here in Louisville, KY.  I am really looking forward to the trees to bloom, the weather to warm up, cute baby animals... and projects!

So a few weeks ago I ordered 3 patterns from Deer & Doe and the first one I completed is the Chardon Skirt.  After that, I just couldn't hold in my excitement to work on the other two as well because her patterns are so simple and pretty.

Blouse:
Day 1: Trace and cut pattern, cut fabric:


 Day 2: Sew Blouse!
 (I assure you that the sewing is even! 
It only looks crooked because of how it is hung and how the fabric lays... it's a tad stiff here)

This blouse was much easier than I had expected given the delicate fabric but with the right sewing needle (rounded) and right tension setting, it was a breeze.  My conclusion is that I am no longer intimidated by batiste and voile.  I was concerned that I would destroy the fabric from messing up a lot, but with a minimum amount of practice on scrap fabric, I really didn't have any major issues with snagging, knotting, tearing, etc.

This is not a blouse I would typically buy for myself but after sewing it, I got attached to it and I think this will get a lot of wear in the near future, especially now that it is officially Spring!


Read More

© 2011 Dash of Rose, AllRightsReserved.

Designed by ScreenWritersArena

09 10