Dash of Rose

A dash of rosy positivity

Wednesday, February 26, 2014

First blogger to blogger package swap


About a month ago one of my friends from graduate school, Miche, from Buttons & Birdcages asked if I'd like to join this blogger package swap.  I've always admired her creative refashions.  Since I'm still pretty new to this blogging world I am very grateful to Miche for reaching out to me and encouraging me to be involved!  As soon as I heard about this package swap with other bloggers who are just all so vibrant and creative, I was instantly super excited for this opportunity.  I love giving presents and meeting new people, so I replied in simply moments that I wanted to be a part of this!

For this blogger package swap I was matched with Zhenya from BeingZhenya.  It was a lot of fun reading her blog because she does a superb job of infusing creativity, fashion, and positivity into her posts.  She is also an incredible thrift shopper! From what I've learned, that is definitely a skill.

The box that my package came in was very securely wrapped... there was no way the contents were going to get out without the aid of scissors or a knife.  Zhenya was right, I LOVE my package!  
I was immediately drawn to this beautifully crocheted blue clutch.  It is so even, has nice pattern, and is just adorable!

Aside from the blue clutch, here are my other goodies:

Buttons -- I can totally use this for my various sewing projects! They feel of good quality and are nice colors.

Trim -- I can see myself using this for a scrapbook in the future! maybe a scrapbook documenting all my projects from 2014?

Cute fabric flower brooch and clip -- Instant accessories!

Elf Maple Sugar Luscious Liquid Lipstick -- Such a nice neutral color, definitely a nice product to keep in my cute clutch :)

The latest MPLS St Paul magazine-- It's such a thoughtful gift to receive something from where she is and I do love to read!


I also just adore the card and envelope that was included.  Where in the world does one get a hold of these?!

This clutch deserves its own photo, it is just beautiful.

Go to Zhenya's blog to read up on what I sent her!

It is amazing what all these bloggers are able to accomplish and they are all so inspiring!

Other participants of this Swap coordinated by Spoolish and Buttons & Birdcages:


Read More

Sunday, February 23, 2014

Engineer sewing

Over the past few weeks I have been realizing more and more the similarities between sewing and Engineering.

Sewing as a basic skill is not difficult but a lot of the skills that are important engineering are also very transferrable to sewing, and can really facilitate any sewing project.  I'm no engineer though... my background is more in the biological and social sciences with some statistics thrown in.

My boyfriend is an engineer and over the years I've really come to respect the skills that engineers have, and the special skills and knowledge that he specifically has.  I'm speaking to more the logic, spatial design, precision, machine-operating, and hands-on skills that at least some engineers have.

Here are a few select Engineering-characteristics(Primarily what I have observed from Mechanical Engineering) that are very useful for sewing projects:

Spatial visualization/Thinking in 3D:
Understanding how pieces exactly fit together towards the final product is crucial in not only sewing but Engineering.  CAD(computer aided design) programs are a prime example of the need to think in 3D as that skill is required to even use the program effectively.

Precision:
This is required because you can really tell a difference when there is not much precision used... lines get crooked, things end up not even, thread unravels, lumps, etc... can definitely happen in sewing projects when one is not precise.  Even cutting the fabric with a rotary cutter requires careful precision.. If you cut the curves and lines crooked, the sewing ends up crooked and your arm might not fit through the sleeves you made (Thankfully this has not happened to me yet... knock on wood).

Order of operations:
Going through the sewing process and building a car both require proper order of putting pieces together.  One cannot ignore the various steps to come because that will really show in the project.  In quilting, you can't expect the batting to be placed easily between pieces of fabric after the fabric has been sewn together, sewing the pocket on as an afterthought just isn't quite the same as building that into the process, etc.

Pattern making:
CAD programs can also be used in pattern making, especially in industrial pattern making fields in the fashion industry. I've watched my guy draft sketches of house plans, homework, and other forms of "pattern making" over the years and can really see how that can benefit me to think more in that way when it comes to my sewing projects.

Characteristic of Materials:
This is very important in both fields.  In sewing, whether or not a fabric is knitted or woven makes a big difference in how it should be cut and sewn, especially given how much stretch a fabric has directionally.  Thread content is important too because if it is not appropriate for the fabric it is sewn onto it can simply break because it cannot stretch enough with the fabric when worn.  The type of fabric and thread also affect the kind of tension required on the machine.  In engineering, very similar principals apply ... I mean they have entire courses devoted simply to the characteristics of materials...different material properties affect their how they behave under various circumstances like heat, tension, etc.

Fine motor skills:
It would be to one's advantage to not be clumsy (I don't think it would be fun to sew a finger by accident and it would not good to weld metal to a table by accident).  Operating machinery (sewing MACHINE, soldering metal, utilizing tools, etc.) requires good fine motor skills.

Knowledge of Machinery:
This is especially useful in troubleshooting.  If you know what pieces are present in a machine and how they interact with each other it is much easier to be able to apply deductive reasoning, logic, etc. to fixing the problem.


Some examples of how he might be better at sewing than me:

1)  Based simply on how the top thread and bottom thread work to keep fabric together... he has shown me a much more effective and efficient way of seam ripping.

2)  He sews in a straighter line than me.

3)  Showed me how the free arm of my sewing machine exists (I obviously did NOT read the manual very well)

4)  Knew immediately that the machine did not sound as it should while I would let it continue that way for a few moments...

5)  Looks at the sewed hem and can identify immediately if the tension was wrong.

6)  He showed me the wonders of Google Sketchup.  He has sketched up many 3-D houses on it and the one time I attempted to, he could see immediately that I did a horrible job because my "walls" weren't even real walls because the lines didn't even connect for it to have been more than toothpicks strung together.

This is not to say he is actually better at sewing than me, he's had years of engineering learnings and experiences from growing up a carpenters son, building furniture and bridges, engineering courses, and his job... and I'm just getting started...

Engineering and Sewing aren't too different.  The methodology is the same though the medium may be different.  You make some sort of plan for that specific project, then you go and build it.

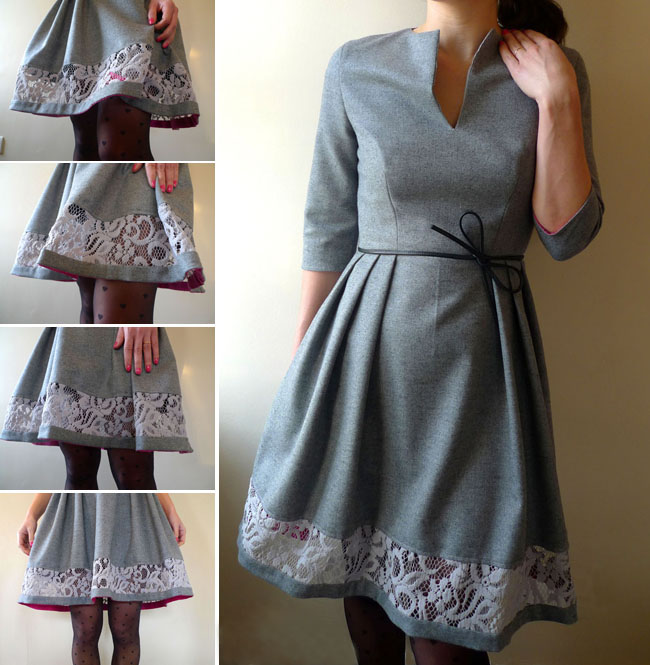
I'm doing pretty well though...He enjoyed telling the cashier that the dress she was complimenting me on was one I had recently sewn :).

I feel like I'm going back to school! Need to study up on some sewing!

My Alma Mater: Miami University (Oxford, Ohio)
Love and Honor!
Read More

Thursday, February 20, 2014

Flannel Sleep Shorts


Flannel is so cozy and I like wearing PJs beyond t-shirt and gym shorts to sleep.  This is really just a personal preference.

During my first major haul of when I purchased all of my start-up stuff for sewing I picked up various flannel from the remnants bin at Joann's.  I had not had anything particular in mind in terms of what I was going to do with it.  All I knew is that I like flannel and I liked the patterns.... and it was cheap.

I wanted to try my hand at making apparel without a pre-designed printable pattern so I went with something simple like these shorts.


Step 1:  Fold flannel in half and then trace the shorts twice giving a lot of space for hemming, adjustments, and the fold-over waist band.


Step 2:  With two of the pieces, right sides of fabric touching, sew along the inseam of each pair of fabric.  One pair will become the front of the shorts, and the other pair will become the back.


Step 3:  with the fabric from step 2 complete, open it up and with the right fabric sides of the completed front of the shorts touching the right sides of the back of the shorts so the wrong sides of the fabric are facing you, sew down the sides of the shorts, and sew the inseam.  I didn't take a photo of that, but hopefully based on how shorts work and the holes your legs have to go through you can figure it out.


Step 4: Cut elastic to fit your waist, but smaller.  Stretch out the elastic as you pull it around yourself to get a feel for how long it needs to be, and add a little extra for good measure.


Step 5: Sew the top of the shorts in, with the wrong sides of fabric touching wrong sides of fabric, to a width that is a bit wider than the width of the elastic that will be used.  Sew along the bottom edge of this around the shorts with a few inches of a gap so you can insert the elastic waistband.  Use a large safety pin on one end of the elastic waistband and with the safety pin on the elastic, push that through one end of the gap and then push it through the entirety of the waist, making sure you don't accidentally lose the other end of the elastic... you could safety pin that to the gap if you want.  Sew the elastic together where it is a most comfortable fit for you (so you should try the shorts on).  Sew the gap closed.


Step 6: With pinking shears, trim the edges of all the exposed frayed edges that you will be finishing up.  With zig-zag stitching, finish up the edges.
Step 7:  I "roll" hemmed the bottom of the shorts.  Rolled hem foots do exist, but the "roll" was large enough with this that I don't think I would have benefited greatly from one.  Hem along the top of the roll, away from the edge.


Ta daaa, new sleep shorts.  Very comfortable.

Now it's time to sleep. Goodnight!


Read More

Sunday, February 16, 2014

Mint and Tiffany blue style : McCall Rocker Dress


When I first started sewing this year, I really thought I'd primarily focus on home decor, purses, accessories, and the like.  Currently, sewing clothes has actually been really enjoyable and I've enjoyed the process of tracing, cutting, and being able to envision the final product early on because the pieces just... make sense.  I am on so excited about sewing clothes that I've been ordering various clothing patterns.  The hard part now is finding appropriate fabric I like.

This dress is made from a (digital) pattern I purchased on McCall's.  Some minor modifications were made.  For this particular version of the dress the instructions called for knit lace and tricot (lining) but I really didn't feel like messing with such delicate fabric right now and I had purchased this fabric a while back and it is just such a pretty mint (slightly blue in certain lighting) embossed knit.  I didn't have a blunt needle handy but after messing around with tension and stitching length it all worked out without much of a hassle.  This dress is much easier than the Garden Party dress and it is more my style.  Another great perk is that it also comes with a youtube video that walks you through the basics of sewing this Rocker dress.

I was finishing up the hemming this morning and had my glasses on.  When I took my glasses off and set them on the dress I realized that the coloring is so close!  I love my Tiffany glasses and now I have a dress to match them! Mint and Tiffany Blue <3

Hopefully the weather will warm up so I can wear the dress!


Read More

Saturday, February 15, 2014

Sew Nice to Have

Sewing is expensive to start up so I definitely took advantage of whatever steep coupons I could get a hold of before buying a bunch of things.  Aside from the thread and sewing machine (the most expensive item) for me I have found that the items below have been very handy (if not a necessity).

Sewing Must Haves:
3.  Small precision/detail scissors (similar)
4. Sharp shears (similar dressmakers shears)
5. Packs of extra sewing machine needles (needles are universal for machines now)
6. Assortment of hand sewing needles with storage magnet (similar)
7. Pins (similar)
8.  Bobbins and bobbin case, make sure the bobbin size is appropriate for your machine.
10. Clear Ruler (Similar)
11. Self Healing Cutting mat (this one rotates)
12. Seam ripper

Sewing needles get dull quicker than I would have expected.  I've heard that one should change the sewing needle after major sewing projects.  A dull sewing needle results in all sorts of violent noises from your machine and essentially gets nothing done apart from exercise your hands because you're always using the seam ripper. So... buy a bunch of sewing needles in an assortment of sizes (especially needles appropriate for the fabrics you typically use -- Refer to the DIY Tips page of this blog).


Sewing Should Haves:
1. Clover Wonder Clips in lieu of pins for thick or layered fabric
2. Tailor's Ham for ironing to help with sewing darts and curved areas such as sleeves
3. Tracing wheel, good to have serrated and blunt edge
4. Assortment of sew-all polyester thread (featured is Gutermann thread)
7.Seams right to measure seams or use as guide

I really like the ruler hem clips for hemming pants because you can have a consistent hem all the way around.


Sewing Nice to Haves:
1. Assortment of braided elastic for waist bands and such (similar)
3.  Velcro
4. Piping Bias Tape (or piping cords to make them yourself)
5. Iron on denim patches
6.  Assortment of exposed and invisible zippers (similar)
7. Compressed air duster to clean sewing machine

For my projects, I like to have various tools/accessories handy. For example, let's say I don't have enough fabric to be sewing a zipper in... well, maybe I'll opt for sew snaps instead.  Or let's say the hooks on a dress fell off or it needs one... problem solved.  How about I fell down and tore up my jeans? Well, I can patch them up quickly enough.  That is why I like to have a lot of the Sewing Nice to Haves handy.  I've also learned that regular sewing machine maintenance is crucial.  It gets really gross when lint accumulates in there and you can't be breathing into it adding moisture... so compressed air duster is great to have around for the computer keyboard and the sewing machine!

Sew Organized:

How I go about organizing things will probably change periodically as I accumulate more things and change how I want to access the goods.  This is how everything looks right now at least.


Sewing Cheat Sheet:

Thread tension can be so tricky when you use different types of fabric so I like to have this on the back of my machine to help me troubleshoot.  The original graphics are on my DIY Tips page of the blog.

Read More

Tuesday, February 11, 2014

Garden party dress complete

This is going to be a short post...

I sewed my first dress!

This is an extension of my previous post {Garden Party Dress: In Progress}


So this pattern is a digital pattern ... it required a lot of cutting and taping.

From reading what people say about digital patterns v. patterns that are already printed on very large thin paper people didn't seem to like the digital ones because the ones you purchase from sites like McCall's you can only print it 3 times during that one year after you download a special program to even open it with.

I don't know if I completely agree with them but so far the only major down side is that they may not come with instructions and the words can be difficult to read.  So... unless it is a really complicated pattern it's probably okay. I guess we'll see what happens when I use the digital ones I purchased that are like that.  The pattern for this dress featured here though does not fall into that category because it is actually very digital friendly and she had really well-written instructions.


This was right before I hemmed the dress and took care of the frays.

Ta-Da! The dress is done!
My friend was visiting the city for work so she came over to sew, I'd say she did really well with minimal guidance!

She chose a really nice pattern of fabric for this.  The post where I made the same purse before, Pleated Purse: Flying Away, includes some photos to help along the way to supplement the tutorial I found online.


Happy Tuesday!


Read More

Sunday, February 9, 2014

Garden Party Dress: in progress


Cut & tape together pattern then cut pieces according to your size.
The pattern I used for this is free! and online {HERE, GARDEN PARTY DRESS}


Cut the fabric needed and mark according to pattern on the "wrong" side of the fabric.


As you can see, I still have quite a lot to do yet.

What I have learned so far...

1) BASTE, BASTE, BASTE! much easier than pins, especially when I don't have a form to be pinning on and have to try it on frequently myself... don't really want to be poking myself.

2) Zipper lengths are easily shortened... with some improvisation. {How to shorten zipper, youtube video}

3) Speaking of zippers... if I had invisible zippers handy I would have used them.  I did not have enough fabric/give to "create" an invisible zipper and I did not sew the zipper in between the fabric and lining.  I'm still a beginner when handling really delicate fabric so for my first apparel project, the zipper is not going to look nearly as polished but I think I can make it work anyway.  Besides, for a first go, I'm pretty pleased with the results so far.

4)  Darting (esp. bust line) is tricky.  This is where it was really important to keep trying it on.  I modified the original darting pattern and "rounded" it off by sewing a short line approximately 150 degrees from the bottom line of the angle (that is parallel to the edge of the fabric).  I really didn't want the dart to look pointy... that... is also not my style. I'm no Madonna.

5) Iron all the time! It really helps negate the effects of pins/clips distorting where the fabric lies, especially when there are layers.

6) This is also the first time I used an actual apparel pattern and up until yesterday I really had never even bothered reading one.  As usual, I am really not known to read instruction manuals and such so it comes to no surprise that I did not know to figure out what every marking meant.  Thankfully, when I did look them up it turns out that I didn't screw up anyway.  I spent a lot of time just sitting and thinking about what I thought it meant and what made sense with the little sewing knowledge I had.  Most importantly, I am glad that I happened to cut directionally with the grain properly ... I learned my lesson... I am paying more attention to these markings.
Here is a great quick tutorial on Understanding Sewing Pattern Markings by Tilly and the Buttons (One of my favorite blogs to follow!).

This is one of the honigdesign's originals:

Sewing this dress really makes me feel conflicted.  On one hand, given how long it takes me to sew part of me just wants to go out and buy a dress instead... on the other hand, this makes makes me think (especially since I'm not big on reading instructions... I think I like giving myself a challenge... or perhaps I'm just difficult) ... and this is fun!

There are just soooo many things to make (Pinterest board just keeps growing)!  I was asked recently if I was going to create a "SWAP" (Sewing with a plan).  That's not really my style.  It doesn't take much to get me to sew apparently.  Right now I have a lot of fabric, assortment of hardware, assortment of invisible zippers that will come in the mail (ha ha), etc. There are a few post it notes attached to some of the fabric that reminds me what it is intended for.  When I'm in the mood to sew I'll simply make whatever I'm in the mood to make, I just have to have a lot of fabric/hardware/accessory options available to do so.  It'll be good to work this way because when I move back to Ohio I will not be a quick drive to any sewing-related store anymore so there will pretty much need to be a store in my own home. 

Sewing is not a cheap hobby for me at all, especially since I do not SWAP, but it sure is enjoyable :).  It certainly isn't any more expensive than when I go through my "retail therapy" phases!

Have a great day!
Read More

Wednesday, February 5, 2014

Hauling for Apparel


First major haul from Fabric.com!

I'll be beginning my apparel sewing journey, hopefully sooner rather than later.  This is a snap shot of everything that got delivered today! Now... details into the specifics.


Apparel fabric 1: 
The color isn't great in this close-up but it's a mint green embossed knit.  I plan on making a simple dress with it.  The pattern is a lot bigger than I had anticipated but I think it'll still look nice.


Apparel Fabric 2: Light pink eyelet for a dress.


Apparel Fabric 3: Teal crepe de chine, also for a dress... maybe a blouse?


Apparel Fabric 4: Black Chambray... maybe a skirt... dress... shirt?

I still need to find appropriate thread for these, but it's inspiring to even look at these right now!

Extras:
Sturdy (washable!) fabric, home decor quality.  I'm contemplating making a laptop bag with this pattern, although I'm wondering if it'll be too "obnoxious" for work...

Oilcloth! Perfect for cosmetic bags and pouches!


I did not actually purchase yarn...I'm not sure if this is a fluke, or a consolation perk due to really late delivery.  I have no problem with the delivery being late given the kind of weather Atlanta has been having (my orders came from Georgia).  I can't complain though, it's good quality yarn and I do technically know how to knit/crochet.  This could make for a good project some day.


Stay warm everybody!


Read More

Monday, February 3, 2014

Birds to market {tote}


This tote is so functional and the tutorial that I found to do this is one of the best free online tutorials I have come upon!  Brought to you by Bijou Lovely, the Market Tote!

The fabric featured here is: Riley Blake Enchant Birds Green (It also comes in Aqua)


The instructions are well done and are very easy to follow so I did not feel the need to supplement with any "tutorial"-esque photos along the way.

Sewing this was really enjoyable actually.  My only challenges would probably be due to the thickness of the charcoal/black canvas that I used as the base and the lining...The thickness affected the thread tension I needed because I had so many layers going on and it made it very challenging to turn the handles right side out.  That itself seemed to take a really long time.  Otherwise, it is a very simple and functional bag and I'm feeling like I'm catching on to this whole sewing thing.  Lining up the handles and the linings and then turning it right side out is finally starting to sink in as familiar.


Now the question is... what market am I taking this to and what am I going to be putting into it? It is really big bag, especially for me... as I'm not much of a large purse person to begin with.  I like to be prepared when I'm out and about, but I also like to be minimal.

I've been finding so many wonderful ideas and inspirations around the internet and have been pinning (Pinterest) a lot! I'm a bit glad because I was thinking that if I keep sewing at this pace... what if I run out of things to learn with(kidding)? I'm hoping that creativity and finding a lot of things functional things to create will keep this going strong. That, and this is a really fun hobby! I realize the options are limitless!

Happy Monday and stay warm!

Read More

© 2011 Dash of Rose, AllRightsReserved.

Designed by ScreenWritersArena

09 10