Dash of Rose

A dash of rosy positivity

Wednesday, January 29, 2014

A few of Feier's learnings and favorite things


This is my month-iversary with my JUKI sewing machine that I received from my boyfriend for Christmas 2013.  It has really brought great joy to my life and I've learned a lot about not only myself, sewing, but about the blogging world.

I've learned that sewing machines are a lot more complicated and particular than I was ever aware of.  Apparently my boyfriend knew more about them than I did (he's an engineer and uses them for sewing some of the prototypes of car air bags during the design process at work).  To quote him, "Yeah, that's why I bought you a computerized one and not a more mechanical one because I knew you wouldn't read the manual." Oh, he knows me too well... I did read 80% of it though! Mostly because I was having issues with figuring out how to take it apart to clean and how to adjust things.  I know better now though!

Here are some of my favorite "cheat sheet" resources that have helped me along the way:


I've learned that sewing is not really a money-saver.  The start up cost is actually pretty steep but I'm finding that you get what you pay for and that unless you somehow stumble upon like-new of notions, good stuff is pricy but it is worth it!  
The above is a photo from my start-up haul...But, it was 50% off!

To attempt to minimize the effects of my hobby making too big of dents in my bank account...

1.  Make lists of type of fabric and notions I will likely use for a variety of projects and be patient so I can buy them when they go on sale...
2.  Take advantage of sales (Like at Joann's, Fabric.com and the like) to stock up on the fabric/notions that are very versatile that I am very confident that I will use in the near future
3.  Sell some of the things I make (I'm not actively seeking any requests, but if they come about from my friends and acquaintances -- typically in person, then I may take them up on it to fund my hobby)
4.  Refrain from shopping as much (I think I may need to re-watch Confessions of a Shopaholic)


On the other hand, the hobby has it's own worth:
1.  CUSTOMIZATION: I can have it look however I want, in whatever pattern I want
2.  I don't have to search months for something because fabric in specific types of patterns and materials is easier to come upon so I can make it myself


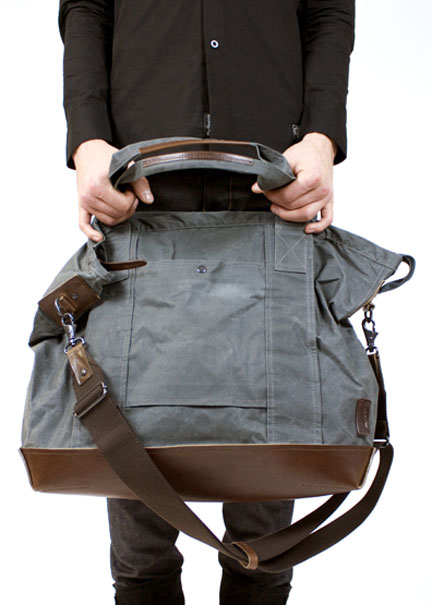
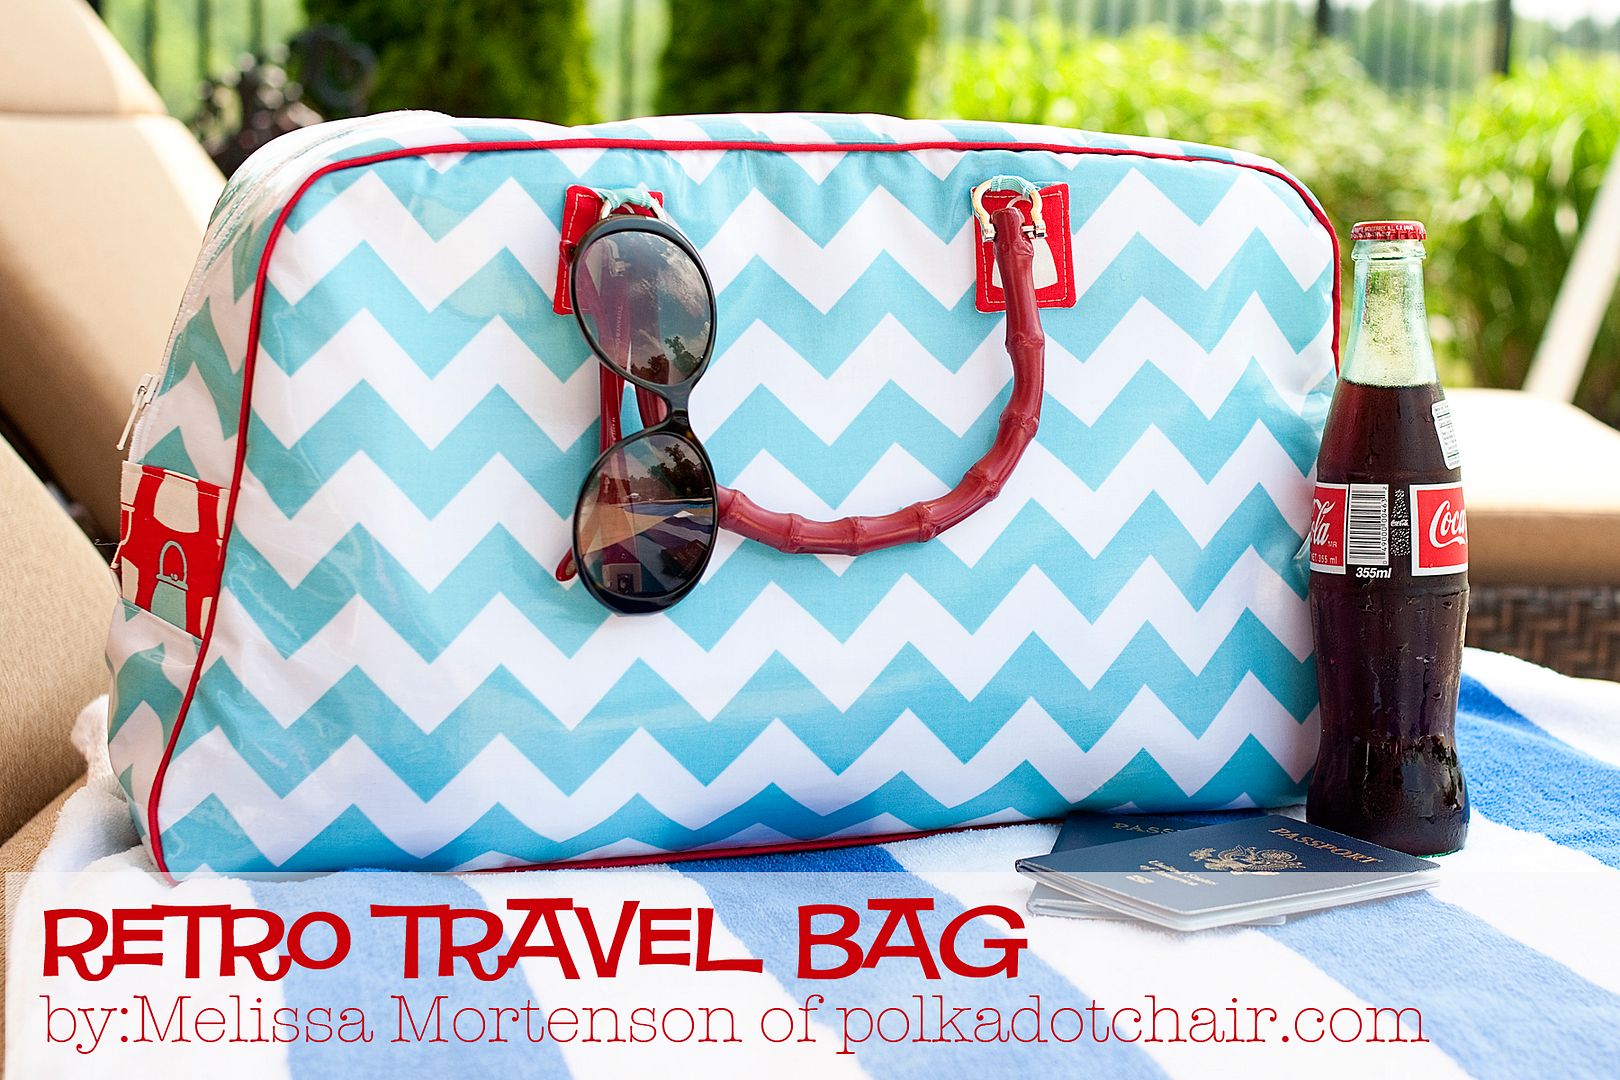
I do love the world of options sewing and DIYs provides.  Here are a few of the projects I am really excited to undertake in the future (that will totally be featured here if/when I take them on!).


Isn't the internet amazing?
Read More

Sunday, January 26, 2014

Fresh updates! Feat. chair slipcover (glitter and at-home car spa as bonus)


So in one of my first posts, I mentioned that I had a project I wanted to do that concerns this office chair below.

This office chair is a massage office chair.  Yes, I realize that sounds nice and all... but it's annoying.  Especially, for making slip covers because it is not symmetrical and the massage-remote sticks way out on one side of the chair.  I tried disassembling this.  I took apart this side of the chair and then discovered that the metal "shelf" that the remote is attached to is literally glued to the chair as well as bolted in somehow.  No matter what I tried, I could not pry it off. I gave up and figured... maybe I'll bother using the massage feature someday ... if I ever figure out where the charger for it is.


Stage 1:  Cut the pieces necessary by laying fabric on the various parts of the chair.  This is very much a figure it out as I go type of project.  I also ironed on fusible fleece on the back and bottom seat part of the chair for a little more structure and that it would lay more stiff, making it easier to see how it is turning out as I make adjustments here and there.  The top middle photo shows pinning of the curves of the seat.  The bottom middle photo demonstrates how I drew the outline of the back... around the shadow.


Stage 2: Put the pieces together and trim.  The top left photo depicts pinning one of the two back pieces of the chair to the front back of the chair.  Top right is pinning the curves of the seat. Bottom left is trimming the fabric (akin to trimming hair) so that when the pleats are sewn on, it's straight.  Bottom left shows fabric having to be cut so it fits around the various objects of the chair interrupting the fabric.


Stage 3:  Make & Sew Pleats then Hem edges.  Then fold in the sides of the fabric so there are no frays sticking out, and sew along the edges.


Stage 4: Finishing touches to the slipcover.  For the gaps, panels of fabric were made and then sew-snapped onto the rest of the slip cover for continuation.  Some modifications were to make the slip cover appear more smooth such as taking the cover in here and there, nip/tuck-ing.


Done!  The back of the slip cover is sew-snapped together.  I'm a big fan of sew-snaps.
Definitely will have a large desk for my future home office after the move this summer though.  Plenty of ideas in the works... though likely not acted upon for months to come just because it's a hassle to move more furniture.

The arms are left bare mostly because I ran out of fabric and I was concerned it would interfere with how I sit in the chair (I don't sit straight in the chair like most people, sometimes I like to sit side ways or with legs crossed on the seat...).
I'm contemplating adding a really plush blanket or some faux fur to drape along the arms though.
Love this desk and the clean lines! and of course, the faux fur.


Though, this is not really a tutorial I'm hoping this gives you some inspiration and ideas towards how to go about doing this.  Each chair is different but the fundamentals are the same.  

TIPS:
1.Make sure you have enough fabric
2.Think about how much you need
3.Make sure that when you sew two pieces of fabric together that the "right/patterned" side touches and the "wrong/blank" sides face out
4.Basting is the best!  Baste really wide (obvious to see) and then sew along those lines... then cut the basted thread out.  This is especially useful for trimming/nip-tucking here and there because the fabric doesn't fall the way you anticipate it will because... let's face it... you sit on the chair a lot and there's an indent in the middle of the chair which therefore changes how the fabric and skirt will fall.
5.BE REALLY PATIENT, this is very tedious and a lot of adjustments are made continuously...and this is very time consuming.  I'm not a complete novice and I'm no pro but this did take me like 5+ hours.  Of course, if I space it out more it would have felt less laborious but when I start something, I don't typically stop until I finish it unless it has nice natural stopping points.  That and when you get in the swing of things, it's just easier to remember all the places on the chair that will need adjustments and such.


But wait... THERE'S MORE! 
Made another throw pillow cover!  This is very similar to the bow pillow post from before (TUTORIAL HERE).
Here is how the new green pillow differs.

1.It's made of snuggly flannel, the fuzzier side facing outwards.
2.For the two back panel pieces, the panel that faces the outside is half the width of the pillow while the one under it is a good 3-4 inches longer so no sew snaps or buttons are needed.  Of course, you could opt for zippers or something here as well, but I like the simplicity of just fabric.
3.IRON ON GLITTER (Tutorial for when I used it in a previous post).


So not only does the inside of my home get some freshness, my car got a bath! Well, the equivalent of a sponge bath.  I drove around town doing errands and noticed that all the car washes had huge lines.  Good thing I have EcoTouch at home! I've been using their products for years.  The products are environmentally friendly, don't require a water hose, smell wonderful (reminds me of going into an Aveda spa really)...and I got to be a little active doing this.
My car's at-home-spa treatment.
EcoTouch sell a lot of products such as this waterless car wash featured here, interior cleaning, tire shine, quick wax, etc.  I bought mine from amazon and they also sell concentrate versions that you can mix with water and just put in a spray bottle!  Now my garage smells like a spa :-)


Read More

Friday, January 24, 2014

By Feiery: Fabric Labels

Iron/Sew on printable fabric labels:

So I bought some Avery Printable Fabric for Inkjet from Amazon two days ago...
I love that they are washable and so versatile! To my surprise, I recently received an "order" for the purse I made recently.  This inspired me to start making labels, some of which may be personalized for specific people, to iron or sew onto the products!  Even if they're just things I'm keeping at home and using myself, I think labels are fun!  Here are some photos:

I also decided to cut pieces of iron on vinyl as extra "security" in the hopes of the ink having better staying power.  I need to get better at the whole cutting thing... but this is the bag I'm keeping for myself, and the first purse I've ever sewed so I know that future projects will turn out better.

How do you add your own special touch to your projects?

Read More

Tuesday, January 21, 2014

Pleated Purse: Flying Away

First bag turned out successful!

Took 1 hour to cut fabric and fuse the fleece interface and 2 hours to sew! It would have probably been quicker had I had a better handle for what the tutorial was saying...

 Here are a few snapshots of the some of the various steps.
Pieces cut // Marking Pleat Location // Clipped and Pinned pleats
Sewed Band pieces to bag part 1 // Band pieces attached to bag part 2 // band pieces to lining
Inside of bag // Making boxed corners // Finishing up: Outer bag inside liner prior to sewing it together and turning it all right side out


Finished Product! Ready to take it to work in the morning!


Bonus DIY:


Made a snow angel today!

Read More

Monday, January 13, 2014

All that glitters: Pillow Edition

Glitter makes a day so much better.


Pillow 1:

So as alluded to in the previous post, I have this cylinder pillow from IKEA (years ago) that came with a red and white striped cover.  It really just reminds me of a candy cane.  I had plenty of white flannel with gold polka dots, the same pattern I used to make my neck pillow cover.

I was not sure what I'd really do with all the flannel I have given that it is pretty stretchy and I didn't want to waste it's softness on just Anything.  A pillow was a good candidate to be clothed by this flannel.


Top Left:  I folded a really long strip of flannel in half that will become the ties at the ends (so the pillow looks akin to a tootsie roll).  I sewed up the long side and one of the short sides.  Note, that the length is double the length of one end of the tie.  Then I turned it inside out.

Top Right: Using the original cover as a model, I cut a very large piece of flannel that will able to wrap entirely around the pillow with some additional fabric left to make it easier to slip it onto the pillow.  It would be helpful to see the final product first before attempting any of this of course.  The two ties are positioned, and the two visible/"right" sides of the large flannel are touching each other so the "wrong" sides are on the outside now.  This photo gives an overall view of the "wrong" sides of the fabric to demonstrate where the straps actually lay.

Middle Left: The ties that were made were then ironed flat and folded in half.  The folded end is then slipped in between the two sides of the large piece of flannel and clipped/pinned so that when the pillow is complete, this can tie outside the pillow.  

Middle Right:  Sew along the long end to also include sewing over the positioned ties. 

Bottom Left:  The edges/ends of the sides of the pillow are then double folded in and ironed flat, then sewed so that no frays are exposed.

Bottom Right: Fold in the frays and sew up the other end of the ties!

Pillow 2:
This project is inspired by the blog: A Beautiful Mess.

So I ordered this vinyl iron on glitter from amazon recently... and it arrived in the mail today.  What perfect timing, I really needed some glitter and fun today.  It's been gloomy, work was long, and this is such a great pick-me-up.  Also, this creation is still washable (though recommended to wash it inside out) !

I had these really plain white pillow covers around in my linen closet.  I think it originally came as a wet with an old comforter set where I sort of killed the comforter in the washer/dryer (not recommended... just go to a laundromat and use one of those really large capacity machines that can handle large comforters.  I don't know why I thought that could have been a good idea at the time...)

After a few moments (yes, just moments) of deciding what to do with this new glitter, I decided that because the pillows are for the bed I'd go with "SWEET DREAMS"

First of all, definitely read the instructions that come with the iron on glitter.

Top Left: Printed out large letters...and then cut them out

Top Right:  When tracing the design/letter on the duller side of the glitter, make sure that you flip the design/letter.

Middle Left: Draw out all of the design/letters and cut those out with an exact-o knife or scissors.  I'd probably have used an exact-o knife if I had any idea of where it was.

Middle Right:  With the shiny side up (the side you want to see), place the letters where you want them and iron it onto the fabric!

Bottom Left:  I used a ruler to help line up the letters to be perpendicular to the sides of the pillow and to make sure it's mostly centered.

Bottom Right: You'll notice that as you're ironing the vinyl-glitter that it will get really stiff, and sometimes the lining will curl up.  Make sure that the design/letter is completely adhered all around to the fabric (be careful...fabric can be pretty hot).  Peel off the lining.

Done!

Sweet Dreams, Everybody!


Read More

Sunday, January 12, 2014

Reorganizing Glovebox: Baby Fiat edition


I've had my Fiat for nearly two years now.  For nearly two years I've had this problem:
I don't keep a whole lot of things in the glovebox... partly because it isn't very big (7" wide in the back, 6" deep...appropriate for my tiny car) so things constantly spill out whenever I open it which is rather frustrating.  In addition, the glovebox is shaped funny.  It's not a symmetrical shape inside, it's doesn't even have right angles.  There is also nothing preventing the contents from spilling out and just sitting on the glovebox door.  On top of all that... there is no light in there.  It is dark... even with the interior lights of the car on, I still can't really see in the glove box, especially from the driver's seat. Double problem.

Materials:
Pellon Peltex Fusible Interfacing (very stiff)
Cotton fabric
Needle & Thread
Round adhesive rubber pad (Similar)


Step 1: Measure the interior of the glove box where the shallow box will sit.  Extend each of the sides out to create the upright sides perpendicular to each of the sides.  The width of these will be dependent on how shallow or deep you want your box to be.  I kept mine at around 2".  Cut it out.


Step 2: Iron on the fusible interfacing onto the "wrong" side of the fabric leaving a lot of space around the interfacing so the extra fabric can wrap around the other side of each side as well as to the bottom of the box.  This way all the visible parts of the box will be covered.  Be very generous with the amount of fabrics you add around the interfacing as this will make it easier to sew later to make sure you don't have any gaps.


Step 3: With the nice fabric on the inside, sew the edges of the interfacing from each side together while ensuring the extra fabric is folded over to cover the interfacing (#1 and #2). When sewing on the bottom of the box note that #3 has very long gaps between the stitching whereas the side that is visible on the inside of the box the stitching is very tight so as to minimize visibility of the stitching at large.  Alternating from long(bottom) and short stitch(inside) to sew the fabric to the box is the approach I took here.  #5 is the inside of the box where you cannot see the stitching.  #6 is the bottom of the box where you can see the stitching but that's okay... because once you place the box in the glovebox you won't even see the bottom anyway.  Keep in mind throughout the process of stitching the fabric on to make sure the edges of the fabric are turned in so you don't have frays sticking out (as you can see in #6).  #7 is the finished bottom and #8 is the finished interior of the box.


Step 4: I found a random adhesive rubber pad lying around that I put at the ends of the rod so it won't slip down the sides of the glovebox walls.


Step 5:  Adhere the LED light to the roof of the glovebox (Make sure it is behind the metal latch so your glovebox door can close.  This particular light is activated by tapping these tiny metal "buttons" on the light.  I chose this one over a motion activated one because I was concerned that it would randomly turn on from the things in the glovebox moving around. Insert the tension rod and adjust accordingly so it is firmly set between the two side walls of the glovebox.  I kept it relatively low so because the red book that holds my car paperwork is pretty thick and takes up a good amount of space in the glovebox.


And you're done!
Interior of my car is now even tidier!

As I was writing this post I also realized that the big tootsie-roll cylinder pillow behind me doesn't go with Anything in my apartment... it needs a new cover, eh?


Read More

Friday, January 10, 2014

It's Here! Foxy Bow Pillow Cover Tutorial


Foxy Bow Pillow Cover


So I recently purchased these from Fabric.com:

As mentioned in the previous post, the fabrics and the method in creating the pillow cover had whether or not it was washable in mind.  I am very particular about having things either be multi purpose of have advantages... such as cleanliness.


Let's begin the tutorial!

What you need for pillow cover:
  • Pillow Insert(s) (Tutorial used 14"x14")
  • Fabric (tutorial used hand-washable dense acrylic and 100% cotton quilting quality fox fabric)
  • Thread
  • Needle
  • Sewing Machine Optional
  • Sew on Snaps or Zipper
  • Light Weight Iron on Interfacing Optional


Based on the 14x14 inch pillows:
Step 1: Cut the foundation fabric of the pillow and sides of the bow:

A:This will be the front of the pillow where the bow will be on top of

B: Each pillow will have two B's. They will slightly overlap.  Although, in hindsight I really should have made this more like 15"X10"(B). It depends on what you want to do.  If you want the back to have a large overlap (Where the back of the pillow consists of two B panels that overlap about two inches or so) instead of snaps or zipper... use 15"x10".  If you're going to use a zipper, then this should be fine.  Though, if you're hesitant with sewing, go ahead and make it 15"x9" each for the zipper or snaps for now.

I wanted to really conserve the fox fabric, so I decided to make the back of the bow(C) plain with some scrap white flannel I had around.  If your bow is made of a solid fabric or some other patterned fabric that you have a lot of and don't mind that you won't see half of it, you can combine pieces C and D by just cutting one that is 18"x19".

Keep in mind that after A,B,C,D You'll still need a piece of fabric to "tie" the bow in the middle.  You'll have to think about how wide and long this will need to be, you'll be able to test it out on the final bow in a few later steps.

Step 2: Making the bow with the back of the bow as plain(C) and different from the bow color that you see(D):

 
Note that the wrong side of the fabric is touching the plain fabric.  Sew along the long sides of the two panels for each pillow.  Then flip it right side out.

Step 3: Sew along one of the long sides of each of the B pieces that will overlap.
Step 4: Pin or Clip the sides of the bow fabric (right side out) on the sides of A fabric, centered.  Each pillow gets one A piece.

Step 5: To test out how wide you need the bow panel piece to be, experiment by adjusting the length of the bow and pinching the middle loosely as it would be with the bow tie-piece that will be made later.  You can trim the sides of the bow panel accordingly to "tighten" the bow look.  Make sure both pillows match each other by the length and position of the bow pieces.

This is a visual of an example of how to make sure both pillows have bows positioned in the same place.


Step 6:  Pin the two sides of the bow panels to the two sides of the pillow front (A).  Clip or pin the middle flat.

Step 7:  Sew the edges of the bow panel to the pillow front (A)


Step 8:  With the results of Step 7 complete, lay it flat on the table with the bow facing you.  Position the two resulting B panels on top of it as so with the hemmed sides overlapping each other. If you want more of an overlap (so you don't need to use snaps) just make sure it is overlapped more assuming you have wide enough fabric. (This is also the step where you could have replaced the overlap with a zipper, with the side of the zipper you actually want to see, with the zipper handle, touching the side with the bow.  Once sewn on, unzip it 3/4 so when you sew all the way around the pillow you will have a gap to be able to flip the pillow right side out).


Step 9: Sew along all four sides of the pillow and then flip right side out.  Notice that because the B panels were not wide enough, once the pillow insert is in, there is a gap because the pillow is puffy.

Step 10: Sew a snap or two to close the gap.

Step 11: Now time for the bow tie!  This depends on how wide you want your bow tie to be.  Again, because I wanted to conserve my fox fabric and I wanted to use one of the scraps I had I actually used iron on interfacing as pictured below.  Similar to creating the bow, you could cut fabric 2 times as wide as you want the width to be and then fold it in half length wise with the wrong sides of the fabric facing out... sewing along the long end... and then flipping it right side out... ironing it flat.

Step 12: This is of course optional.  My machine comes with a lot of stitching options so I wanted to give it a little detailing with stitching 32 in its "uppercase" level.  I used this to just add a border along the long sides of the bow ties.


Step 13:  This is based on how thick you want the bow tie to be.  Experiment around until you find just the right sizing for your bow to have the right look you want.  Cut it to be about an inch longer than the width if you had allowed the two ends to barely touch.  Overlap it to the look you want, fold over one of the edges and then use small stitching to sew it up.  Then flip the sewn side to the back of the bow.


There you go! Tutorial for the Washable Foxy Bow Pillow Cover! Have a good weekend everybody! Plenty more projects to come!

What have you been working on lately? What inspires you?
Read More

© 2011 Dash of Rose, AllRightsReserved.

Designed by ScreenWritersArena

09 10